Showing posts with label Simple Stories CT. Show all posts

Thursday, April 6, 2017

Simple Stories Soccer SN@P Pages

Hey guys ! I am happy to be back with you today. I am going to be sharing some pocket pages in a new size.

This year on the Simple Stories team I will be using the 6x8 SN@P albums. So this year I will adding to my kids albums and other projects.

So let's get to the fun stuff shall we. Last Spring we signed Katelyn up for her first soccer season.
During the season I snapped some fun mini photo shoot type of photos. I used one of them here and made it a 6x8 size to start out her pages.


It turned out that I had a lot photos from the season that I wanted to try and include. These 2x2 Insta Pocket pages were perfect. They allowed me to add in more photos and also to have a little bit of fun with some of the patterned papers. I really didn't want or need all those pockets so I trimmed off the top row for a fun look. 

I knew that I wanted to include that word sticker that says Soccer somewhere. I decided to add it onto the outside of the page protector and add it right in the middle of the page protector. That got me thinking that I could use it and the clear page protector as a see thru element to the next page. I positioned my journaling just right so that the word soccer was on top of my photos journaling on the next page. Once I had that figured out I filled in the extra pockets with photos and patterened papers plus stickers. 


Here is what the other side looks like. I carried on with the photos plus simple embellishing with some patterned paper and some stickers from the sticker sheet. 


This right side of my spread talks about the practices a little. I thought that journaling card was perfect for it. One of the journaling card had these adorable stat boxes that I cut up and added in throughout my pages. I love how they turned out and I added in numbers into the boxes. 


I took this photo of katelyn at practice one night. It was late and the sun was going down. She is not in focus but I still love how it turned out. 


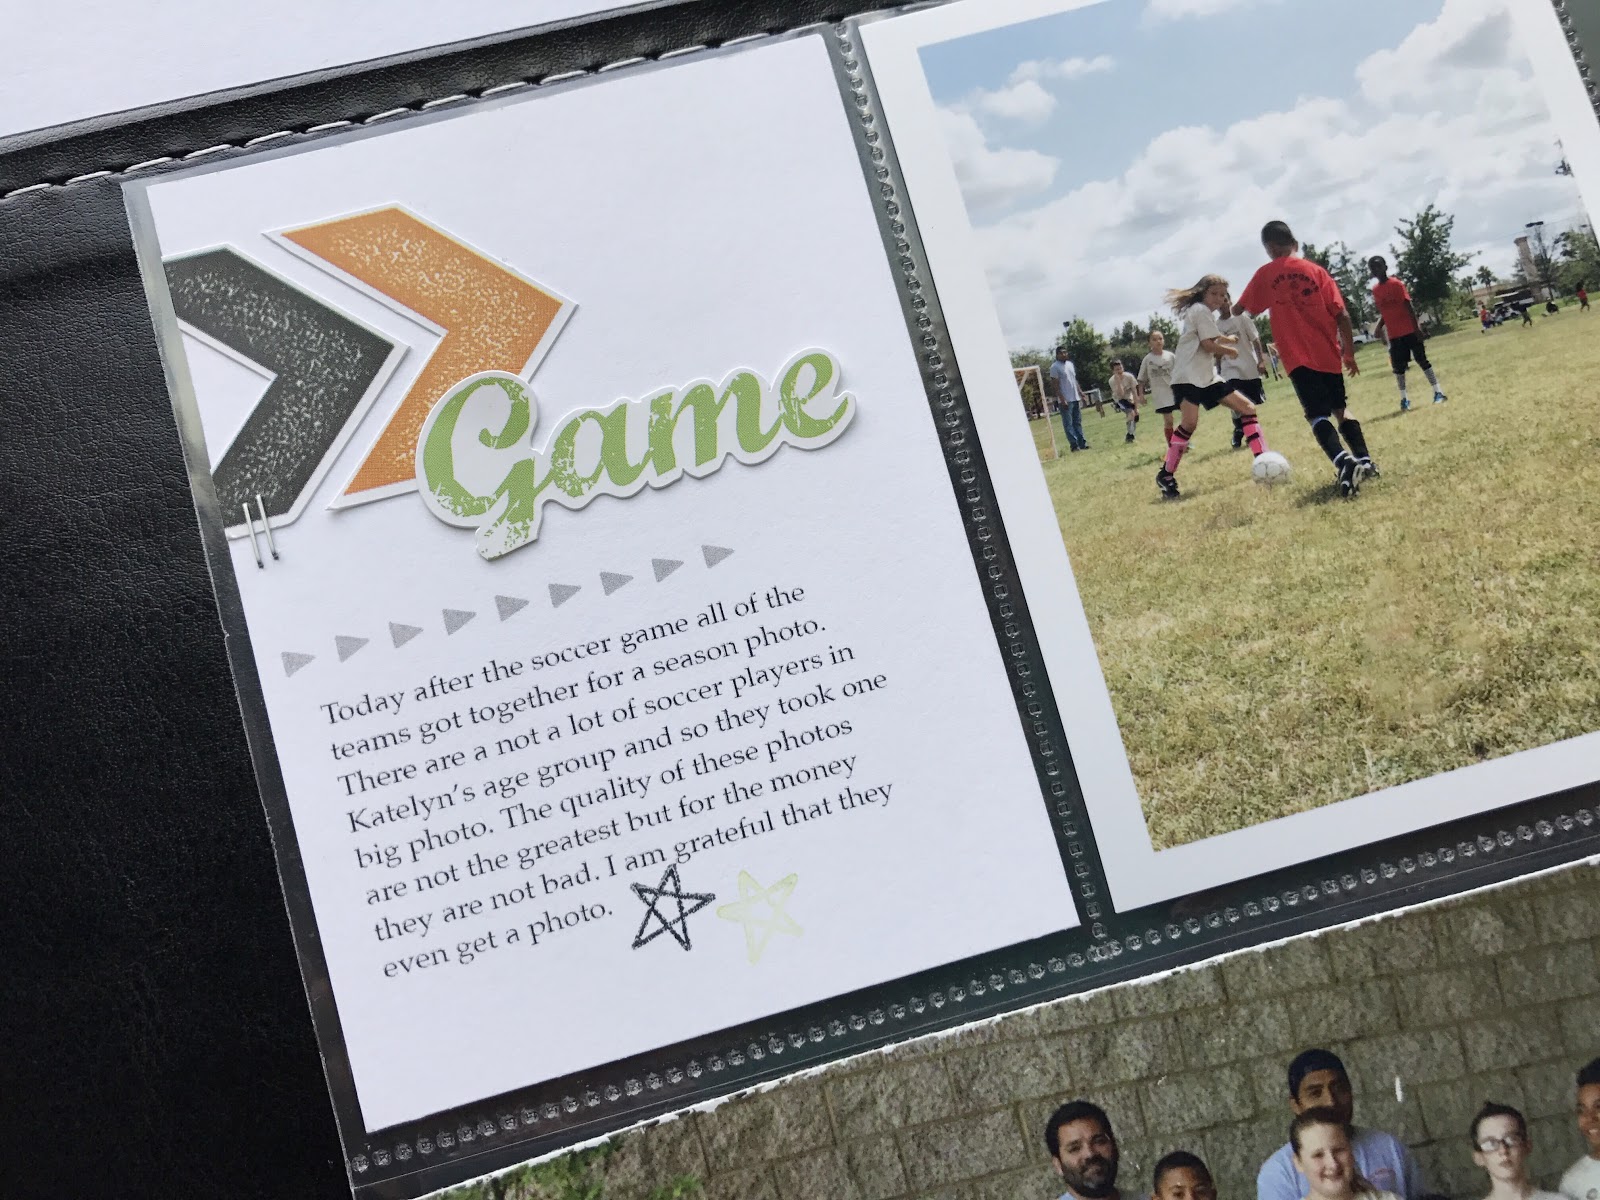
The next set of photos talk about game days and team photos. 


Even though the team photos were poor quality I am so happy that they even did team photos and wanted to add them in to the album. I added in a journaling card that I created with some of the stickers from the sticker sheet. I just love those colored arrows and used them all up. 


I created a custom journaling card here with some of the stickers. These arrows were my favorite. 

Here is a look at the last spread that I created. 


These pages were filled with some misc. photos and a few journaling cards. I made my own 4x6 journaling card using some of the stickers and strips of patterned paper. Those soccer ball stickers are so adorable and I was always saying " Go Katelyn" so it was perfect to use the soccer ball as a O in the word GO. 


Thanks so much for coming everybody !! Have a great day. 


Wednesday, March 1, 2017

A Disney Day | Simple Stories

Good morning everyone ! 

I am so happy to be with you all today. It is no secret that we as family all love to go to Disneyland. 
I am going to be sharing some pocket pages that I created using the new Simple Stories Say Cheese 3 collection. It is simply adorable and if you have Disney photos, or even fun amusement park photos then this one is for you. Check it out in a store near you very soon. I think they are shipping next week. 

Let's get started. Here is a look at the whole spread. 

 
The collection has lots of your typical Disney colors with a little bit of blue thrown in. It was perfect for my photos. 

I didn't necessarily need a title card but I thought that I would use some of these cute die cut pieces from the collection. They are always so fun to play with. 


One of the first things we do when we get to the park is go and pick up some fast passes. I took a photo of this very thing and added a banner on the bottom of the photo. 

The next card I used was this adorable Mickey filler card. I loved the actual Mickey shape and so I embellished it some using a piece of vellum and some more of the bits and pieces. 


Here are a few close ups for you of this left side of my spread. 


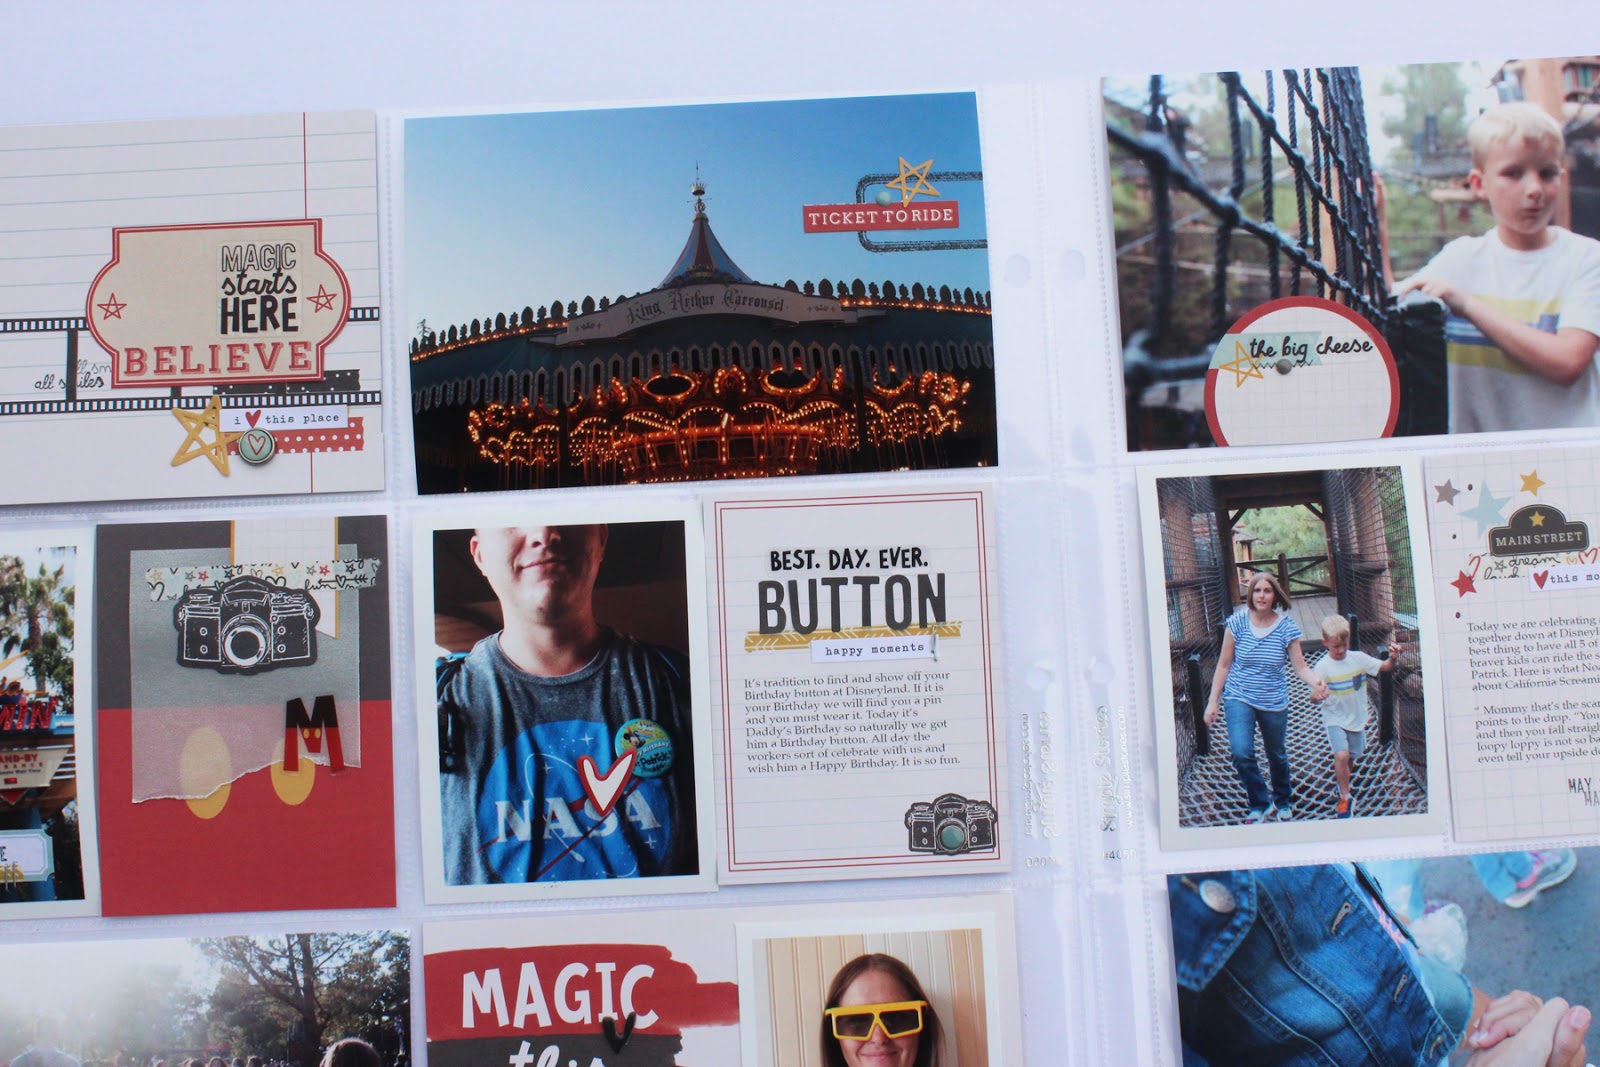
Nighttime at Disney is such a magical time. I took this photo of the carousel when the sun was setting and I just love it. 

The whole reason we went down to Disney that particular day was for Patrick's birthday. It is tradition to get the birthday person a birthday pin. I wanted to make light of it so I added the word button to the journaling card next to his photo. I added a clear sticker on top of the word button and I love how it turned out. 


Let's move on to the right side now. 

One of my favorite parts about Disney is the quality and fun time we have as a family. We laugh together. We hold hands together. I love how my kids always reach for my hand as we are walking. And there is a lot of walking that goes on, so therefore lots of hand holding. 


More Disney fun. This particular day we spent lots of time over on the California Adventure side of the park. The rest of the family went on the river run, and California Screamin. I was happily left behind to take the photos. 


When I putting my pages together one of the things I try to do is break up the photos with some white. This time it happened to be cream and I spread out a 4x6 journaling card right in the middle of this page. 

It was the perfect softening piece and I used it to hold some journaling and lots of fun embellishments. 


Last but not least is the food at Disney. Oh my. Lots of good food. This particular day Katelyn and I think Patrick got turkey legs for dinner. Isn't that cute turkey leg the cutest thing ! I knew I had to use it with this photo. 


Well that wraps up my Disney pages for today. Thank you all so much for coming to the blog today. I hope that you might have found some inspiration. 

I did film a process video for this one and will get it up shortly to my channel. 

Thursday, February 2, 2017

Project Life Week 2 & 3 | Simple Stories

Hi there !

Today I am going to be sharing some more Project Life pages. Now I have to explain about how I am going to be doing my January pages. It turns out that we went to Disneyland the second week of January and then we went to the beach the week after. So I had less photos from the regular week. I decided to combine week 2 and week 3. That is what you are seeing today.

I am using the new collection by Simple Stories called Love and Adore. I loved this collection ! The colors were so fun to create with.

So lets get started.


I am so happy with how this spread came together. The colors seemed to be made for each other. The products plus the photos. I had so much making this one.

For my title card I started out by cutting this awesome heart out from a 4x6 journaling card. I loved the pattern and the color of the heart but needed some more room to add my dates and stuff. I add it to a piece of white cardstock to make the heart stand out more. Since this was going to be my title card I had to figure out where to add my dates. I went with a label and tucked it underneath that hello chipboard piece. 


I went ahead and chose this journaling card with lots of white space and those hearts in a row at the bottom. I needed a card that I could add a longer story onto it and this one was perfect. The story goes with the photo below it. As you can see those great hearts on the bottom of the card. I accidentally discovered that the leftover/inside piece of the yellow chipboard heart fit perfectly inside these hearts. It adds a little piece of dimension to the card. 

The next card holds a photo of my son and has some journaling underneath the photo. I was working in my scrap room while the kids were playing outside one afternoon. My son thought it was so funny to sneak up and shoot his nerf gun at the window. The card itself has some embellishments on it already and it was perfect to add a few stickers and some enamel dots to finish it off. Simple and easy. 


Let's move over to the other side of my spread. It turned out that I had more to say about these weeks then I had smaller pockets. I added in this 4x6 journaling card to recap the week so to speak. On the bottom of the card I added that cute chipboard banner for some eye candy. The color scheme came together super easy this time with a lot of pinks, blues, and reds. I chose to create a filler card with this blue arrow patterned paper. On top of the card I layered some stickers and a cluster of embellishments up at the top. 


Don't be afraid to cut up your journaling and filler cards and use them as you need. That is what I did here with the watercolor strokes card. Originally it was a 4x6 card and I was looking for a  journaling card for my story about making things. So I cut it down to 3x4 and went from there. I wanted to talk about how we all have been making things lately. My husband has been baking bread and I have been busy making crafty things. I got to work and used a combination of letter stickers and the word sticker "be" as a title for my journaling card. I added some strips of washi tape underneath. It acted as a longer home for my title. 


I couldn't resist using these big and fun chipboard X and O pieces. So I used them right on top of my photo. It left this perfect little pocket to add my journaling on the other side. I also added in some of the bits and pieces above the X and O chipboard pieces. 


One photo that I did include in these pages were one from our trip at the beach. Whenever we go down to a particular beach we stop at the fruit stand. This time we picked up some strawberries, oranges, and mangos. It is kind of tradition to take a feet shot. 


That is a wrap of week 2 and week 3. I have already shared our Beach day pages and still need to complete the Disney spread and week 4. 2017 is off to a great start. 

Thanks so much for coming everyone !! 


Saturday, December 3, 2016

December Daily 2015 | A mix of days

Hey guys,

I wanted to pop in today with a quick blog post about some pages I created for my 2015 December Daily album. These pages I created for a Simple Stories assignment and I love how the turned out.

Here we go. This one is from day 8. Patrick and I went to a work dinner.


One of my favorites from the Classic Christmas were these gold letters. I had fun with some watercolors on some cardstock and then I layers some stuff to make this filler card.


Here is a close up of the right side. Isn't is so pretty.


Day 13 was talking about how I was finally getting around to finishing up decorating for Christmas.


I used another one of those fun pages. This one was perfect for this day, as it was shaped as a door.


Here are some close ups.


Day 18 we went to see the Star Wars movie. Here is day 18 and 19.


The top of day 18.


The bottom of day 18. I used another gold number and made a christmas tree out of patterened paper.


Day 19 we had a church Christmas party and Santa came.


Journaling card for seeing santa. I cut this cute Santa out and added him onto a 4x6 piece of Cardstock. Then I embellished around it and added a strip of patterened paper to the bottom.


I had 3 Santa photos that I loved and adored. I wanted to make sure I used all of them. I chose to use a photo flip and add it to the bottom pocket.


I added a little embellishments to each of the Santa photo and I also added their initial to the photo.


There you have it. A few pages are now done in my 2015 album. I have to admit that there a lot more pages that need to get done. Last year I had printer problems then I ran out of paper, and just stalled out all together. I am glad that I was able to pick it back up and get some stories told.

I have to run now. We are going to go pick out our Christmas tree. Yippee !

Saturday, June 4, 2016

Let's Grow a Garden | Simple Stories

Hello everyone ! I am so happy to be here with you today. The kids are out of school and summer has officially begun. I am looking forward to lazy days, swim days that linger into swim nights, popsicles, pajama days, adventures of many kinds, sleeping in, and so on. How is your summer so far ?

About a month ago the family and I got together and started planting our garden. We have a rather large side yard that is mostly dirt where we have 4 garden boxes set up. It took many man hours, a few set backs, and three weekends to get to the point of planting. But alas, I was determined to at least get a few things in the ground this year.

We purchased a few vegetables and some seeds and set to work. I took some photos that day and I was so excited to put these pocket pages together this past week.

Simple Stories has a new collection that came out that is called Bloom & Grow. You guys, it is the cutest thing ever ! Lots of great colors, some wood grained elements, and lots of adorable gnomes.
I created these two pages for an assignment that was on their blog yesterday ( June 3rd).


Typically I create weekly spreads for my Project Life album but this one was a theme based one. So I created this sort of title card. There is a filler card that has this fun Garden quote on it that I wanted to put on my title card. I finished it off with a few embellishments.


This is a closer look at what the left side looks like. I really loved how the collection was a great color match to my photos. The wood grain and the navy are beautiful together. Then the hint of green was perfect.


This year the kids each picked out a bag of seeds to plant. Noah picked carrots, Maddie picked watermelon, and Katelyn picked corn. I wanted to get a photo of the seeds in his hands to remember that we planted seeds this year. The journaling card next to it was perfect. The wheelbarrow on the bottom, I love it !

The bottom left corner photo is of Katelyn and Patrick getting Katelyn's corn all ready to plant in rows. They worked really hard on this project and they planted a whole garden box of corn. The photo next to it is of all of us working on the garden. I cut up one of the bits and pieces die cuts and added it to on the photo along with a few stickers.

These pages turned out to be more photo heavy and not a lot of story. There wasn't really much to tell other than the couple spots that were used. I filled a few of the pockets with some fun filler cards.


Here is a closer look at the filler cards. Most of the cards from Simple Stories are mostly embellished for you. That is what I love about them. I can simply add a stamp, or a few stickers, and end up with a great looking card.


Let's move on to the right side.

On this right side I used a Simple Stories Design 4 page protector. It is a lot like a few out on the market today but it has this fun 2x12 pocket. I cut up some patterned paper and simply embellished it.


I wanted to use the white space in the photo of me holding the carrot package. I decided to cut up a 4x4 card and add it to the corner with some embellishments.

The journaling card in the corner came together easily. I knew that I needed some white to balance out the photos and other elements. I paired a little doilie with a 2x2 card. I used the card as an embellishment with a few stickers.


Here is another journaling card talking about the garden stakes I got for the garden.


When there is some white space on a photo it tends to be used up. I added some embellishments on the top and then some journaling to the bottom.


I really enjoyed creating these pages for Simple Stories and using their wonderful collection. While I stayed fairly simple this time around I believe it was the right choice. I was able to keep the focus on the photos that tell a story about how we planted the garden this year.

Thank you all for joining me today. I have a small insert that I created using this collection to share with you shortly. Also my Week In The Life Tuesday pages.

Take care and happy weekend.